Installation, operation and maintenance of reciprocating water injection pumps
Reciprocating pumps installation
1) Check the relative position of the reserved holes for anchor screws, put the anchor screws into the reserved holes, and place wedge iron.
2) Place the pump unit flat on the wedge iron and install the anchor screws.
3 )Place the level on the machined surface of the crankcase, and adjust the wedge iron so that the horizontal and vertical levels are 0.1/1000.
4 )After the 15-day curing period of the second pouring of concrete, check and adjust the longitudinal and transverse levels of the pump unit again to meet the requirements and fix them.
5 )When installing the inlet and outlet pipelines, additional pressure on the pump should be avoided. The pipeline should be cleaned after installation.
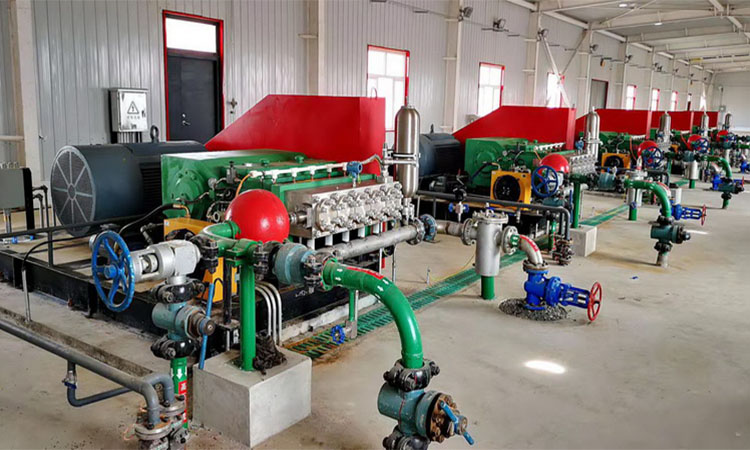
6 )When several pumps are connected in series, the flow rate of water in the external pipelines shall not be greater than 0.7m/s.

Reciprocating pump starting
1) For pumps that have been out of operation for more than six months or that have been stored in the open air for more than two months, each moving pair and sealing parts should be inspected before reuse.
2) Fill the crankcase with lubricating oil. When the pump is running, the oil level should be in the middle of the oil mark.
3) Turn the belt and check whether there are any obstacles in the movement mechanism.
4) Fill the suction regulator with nitrogen until the inflation pressure reaches 0.03Mpa.
5) The too-low contact point of the suction electric contact pressure gauge in the automatic control panel is adjusted to be greater than zero and less than the suction pressure, and the too-high contact point of the discharge electric contact pressure gauge is adjusted to 1.1 times the rated pressure value.
6) Open the water inlet gate valve and return valve, open the air release valve on the suction regulator, and close the water release valve when no gas escapes.
7) It is required to start the pump without load for one hour and check the operating status of the pump.
8) Close the water injection gate valve, slowly adjust the return valve, and increase the pressure by 5MPa every ten minutes. After the pressure reaches the water injection pressure, open the water injection gate valve, slowly close the return valve, and transfer the pump to normal load operation.
Reciprocating pump outage
1) Slowly open the return valve and close the water injection gate valve to allow the pump to run without load.
2) Cut off the motor power,
3) Close the regulating valve, return valve and water inlet gate valve,
Reciprocating pumps maintenance
1.Precautions
1.1 Whether it is manual parking or automatic parking, after parking, you should first close the water injection gate valve to cut off the backlash of the downhole pressure, then open the return valve, close the water inlet gate valve, cut off the high-pressure water, and open the water discharge gate on the water supply nipple. Relieve pressure in the pump head. At the same time, observe the discharge and suction pressure gauge on the automatic control panel. After the pressure is released, the pointer should point to zero. The pump can be disassembled and repaired only after the pressure gauge reaches zero, otherwise it may cause serious accidents involving personal injury or death.
1.2 Insufficient liquid supply and the pump is not allowed to be started when the pump is under load.
1.3 Any repair work is strictly prohibited while the pump is running.
1.4 During maintenance operations, all pressure in the pump must be released, otherwise the operation is not allowed.
Disassembly and assembly of some components for reciprocating pumps
2. Disassembly and assembly of pump valve:
2.1 Remove the compression flange at the front end of the pump;
2.2 Take out the combined valve body;
2.3 Just take out the suction valve piece and spring. Assembly in reverse
3. Replacement of valve disc and maintenance of valve seat
3.1 When the valve plate and valve seat are damaged or the efficiency drops below 90% of the original value, the valve plate should be inspected or replaced. As for the valve seat, it is generally not replaced. It can be smoothed with a whetstone to ensure tight contact with the valve plate. If the contact surface of the valve seat is roughened, it can be removed and repaired before use.
3.2 Before installing the valve disc, check the flatness of the valve disc. Use a ruler or caliper to place it against a flat surface and check the light to see if there are any gaps. The surface of the valve plate should be smooth and smooth, without scratches or pits. If it does not meet the requirements, it can be ground smooth on a whetstone before use.
3.3 Place the spring and spring seat, tighten the fastening screws, and then check whether the valve plate can be opened. Make sure it is correct before installing it into the pump head.
4. If the plunger and packing are used and assembled improperly, or bumped during transportation and storage, the plunger will be damaged, so attention should be paid. During the movement of the plunger, the packing will be continuously worn. When the wear is large, it should be replaced in time. Otherwise, liquid leakage will occur, affecting pump pressure and reducing the efficiency of the pump unit. The specific operation process is as follows:
4.1 Loosen the four nuts on the front flange of the pump head.
4.2 Loosen the plunger clamp.
4.3 Crank to disengage the plunger from the plunger tappet.
4.4 Rotate the packing box body so that the boss on the packing box body is staggered with the boss on the flange of the packing box, and remove the packing box.
4.5 After removing the packing box, unscrew the packing box gland, remove the packing box gland bushing, pull out the plunger, and then remove the packing and replace the packing. Note that the incision positions of the two sealing packings should be staggered from each other and not allowed to be in the same position, otherwise the sealing effect will be affected. The sloping cuts of the filler should be well aligned, and lead pads should be placed between each pass of filler.
4.6 The new or cleaned plunger should be carefully inserted from the front of the packing box (it can be knocked with a wooden stick)
4.7 Put the packing box with the replaced packing back into the pump body and tighten the nuts. Pay attention to tightening the nuts evenly and diagonally, otherwise the plunger and plunger lifter will be out of axis. The inspection standard is to turn the machine gently so that the positioning boss of the crosshead tappet naturally enters the plunger positioning hole. Otherwise, the nut should be re-tightened. It is strictly prohibited to pry the plunger to force it into the positioning hole.
4.8 Install the connection clip
4.9 Turning, the packing is a specially made clean, self-lubricating product. During transportation, storage, and use, it must be strictly kept clean, and especially it must not be stained with hard substances such as metal particles and sand. , otherwise the plunger will be easily strained.
5. Replacement of skeleton oil seal
Skeleton oil seals are installed on the crankshaft and plunger lifters. If serious leakage is found during pump operation, it should be replaced in time. The assembly quality of the skeleton oil seal has a decisive impact on ensuring the sealing performance of the oil seal and extending the service life of the oil seal. When assembling, pay attention to the following points:
5.1 Apply oil to the lip of the oil seal. On the one hand, it reduces the friction during assembly and makes assembly easier, and at the same time, it also provides lubrication when the machine is started.
5.2 The step of the shaft should have a 30° chamfer. If there is no chamfer or the chamfer is unqualified, a protective sleeve should be used to protect it during assembly to prevent scratching the oil seal lip.
5.3 When inserting the oil seal into the hole, use a round sleeve of suitable diameter to tap on the oil seal. At the same time, ensure that the oil seal is installed in place and perpendicular to the axis.
5.4 The installed oil seal should be smooth and without deformation, especially the lip should be smooth and without damage, and the lip spring should be appropriately tight.
Adjustment of some components for reciprocating pumps
6 Adjustment of narrow V-joint belt
6.1 This pump set uses a narrow V-joint belt, which has the characteristics of small structural size, large transmission power, high efficiency and long service life. However, if it is used and adjusted improperly, its advantages cannot be fully displayed. Therefore, please pay attention to the following points when using it:
6.2 The belt should not be exposed to the sun during storage and transportation. It should be placed flat in a cool and ventilated place. The belt should be kept clean and
no fuel.
6.3 Do not drag it on the ground to avoid damaging the outer surface of the belt.
6.4 Belts of the same length should be selected for use, and new and old belts should not be mixed.
6.5 When installing the belt, do not use a crowbar to force it into the wheel groove. This will damage the belt and greatly reduce the service life of the belt. The position of the motor should be adjusted so that the belt can smoothly enter the groove, and then the belt should be tightened.
6.6 The axes of the large and small pulleys should be kept parallel and located on the same plane, otherwise the covering layer connected to the combined belts will easily fall off and be damaged, reducing the life of the belts. Inspection method: Use a straightened thin wire to lean against the end faces of the two pulleys, and observe the closeness between the wire and the pulley. The maximum allowable error is: the small pulley and the thin wire are level with each other, and the gap at the outermost circle of the large pulley is less than 1.5 mm (1/16 in.).
6.7Measurement of tension.
Proper tension is an important condition to ensure the normal operation of narrow V-joint belts. If the tension is too large or too small, the service life of the belt will be shortened. The new belt can be slightly larger than the following value by 1/3.
Measurement method: When a force of 720N is applied to the middle part of the upper surface of the combined belt, the belt will drop approximately 17mm (11/16in.), that is, there is no need to tighten the belt very tightly.
6.8 When replacing the narrow V-jointed belt, the same belt type as the one provided by our company should be used. In places with explosion risks, anti-static belts should be used.
7 Fill the suction regulator with nitrogen
7.1 Close the water inlet gate of the pump.
7.2 Loosen the air release valve screw
7.3 Connect the inflation pipe directly between the nitrogen bottle and the inflation valve.
7.4 Loosen the knob of the inflation valve, slowly open the switch of the nitrogen cylinder, and observe the inflation pressure with the ammonia cylinder pressure gauge. When it reaches 0.03MPa, stop inflation immediately.
8. Protection during long-term storage
If the pump is not installed and operated immediately, or if the pump cannot be operated for a period of time after installation on site, the pump unit must be protected as follows:
8.1. Store in a dry and clean place.
8.2. Fill the pump cavity with engine oil.
8.3. Be sure to seal the cover on the pump body correctly.
8.4. Rotate the pulley at least several times a week to make the crankshaft rotate.
8.5. Apply anti-rust paint to the unpainted outer surface.
8.6. Cover the pump or motor transmission with plastic or waterproof canvas
Supplier of oilfield water injection pumps
Sino Mechanical Equipment is a supplier of oilfield water injection pumps, providing centrifugal pumps, plunger pumps, screw pumps, diaphragm pumps, etc. Sino Mechanical Equipment is based on Shengli Oilfield, the second largest oil field in China, and provides high-quality petroleum equipment and services to the world.